Mineral specimens, whether modest finds or high-end collector pieces, are inherently fragile. Damage can occur during extraction, transport, preparation, or even display. Chips, breaks, loose crystals, and surface instability are all common issues. While some collectors prefer untouched specimens, careful and sympathetic repair can stabilise and preserve a piece, improving both its longevity and aesthetic appeal. The key is to repair without compromising authenticity or value.
Understanding When to Repair
Before attempting any repair, it is essential to decide whether intervention is appropriate. Not all damage should be fixed. In many cases, especially with high-value or historically significant specimens, restoration can reduce desirability if done poorly or without disclosure. However, repair is justified when:
- A specimen is structurally unstable
- Loose crystals are at risk of falling off
- A clean break can be reassembled accurately
- The repair improves long-term preservation
Collectors generally accept stabilisation (preventing further damage) more readily than cosmetic enhancement.
Assessing the Damage
Careful inspection is the first step. Examine the specimen under good lighting and, if necessary, magnification. Identify:
- Clean breaks versus crushed or missing areas
- Loose versus detached crystals
- Fragile matrix material (such as crumbly shale or clay)
- Previous repairs or residues
Understanding the mineral’s hardness, cleavage, and stability is also crucial. For example, minerals like fluorite or calcite may break cleanly along cleavage planes, while others like quartz tend to fracture irregularly.
Choosing the Right Adhesive
The most commonly used adhesive in mineral repair is a clear, reversible epoxy or conservation-grade adhesive. The ideal adhesive should:
- Dry clear and not yellow over time
- Be strong but not brittle
- Allow for precise application
- Be reversible if possible
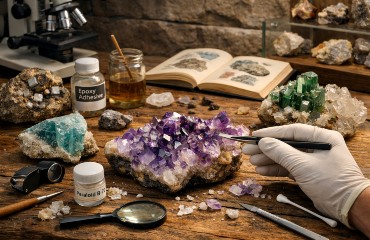
Two-part epoxies are widely used due to their strength and clarity. For delicate work, conservation adhesives such as Paraloid B-72 are often preferred, especially in museum contexts, because they can be reversed with solvents.
Superglue (cyanoacrylate) is sometimes used for quick fixes but is generally discouraged for valuable specimens. It can leave visible residues, is difficult to reverse, and may degrade over time.
Repairing Clean Breaks
For a specimen broken into two or more pieces, the process is relatively straightforward:
- Dry fit first – Ensure all pieces align perfectly before applying adhesive.
- Clean the surfaces – Remove dust or debris using a soft brush or compressed air.
- Apply adhesive sparingly – A thin layer is sufficient; excess glue will be visible.
- Join and hold – Press pieces together and maintain alignment until the adhesive sets.
- Remove excess – Carefully clean any squeeze-out before it hardens.
Patience is essential. Rushing the alignment or using too much adhesive will result in a visible and often irreversible repair.
Reattaching Loose Crystals
Loose crystals are a common issue, especially in cabinet specimens. If the original position is known, reattachment can restore the specimen’s appearance:
- Use minimal adhesive applied with a fine tool (such as a pin or toothpick)
- Position the crystal carefully and hold it steady
- Avoid excess glue, which can spread onto visible faces
If the exact placement is uncertain, it is often better to leave the crystal unattached rather than guess incorrectly.
Consolidating Fragile Matrix
Some specimens have a matrix that is soft or crumbly. In these cases, consolidation rather than bonding is required. A diluted conservation adhesive can be applied to strengthen the material:
- Apply with a dropper or fine brush
- Allow it to penetrate the surface rather than sit on top
- Build up in thin layers rather than one heavy application
This technique is particularly useful for specimens from clay-rich or weathered deposits.
Cleaning Before and After Repair
Cleaning plays an important role in successful repair. Dirt or grease can prevent adhesives from bonding properly. However, cleaning must be done with care:
- Use distilled water where appropriate
- Avoid harsh chemicals unless you are certain they will not damage the mineral
- Ensure the specimen is completely dry before applying adhesive
After repair, any visible residue should be removed gently to maintain a natural appearance.
Ethical Considerations and Disclosure
Transparency is critical in mineral collecting. Any repair, no matter how minor, should be disclosed if the specimen is sold or displayed. Undisclosed repairs can damage trust and significantly affect value.
In high-end collecting, originality is often prized above perfection. A small chip or natural break may be preferable to a poorly executed or hidden repair. The goal should always be conservation rather than deception.
When to Seek Professional Help
Some repairs are best left to professionals, particularly when dealing with:
- High-value specimens
- Complex breaks with missing material
- Rare or scientifically important pieces
- Minerals sensitive to heat, moisture, or chemicals
Professional conservators have access to specialised materials and techniques that minimise risk and maximise reversibility.
Final Thoughts
Repairing mineral specimens is as much an art as it is a technical process. Done well, it can stabilise fragile pieces and preserve their beauty for years to come. Done poorly, it can permanently diminish both aesthetic and monetary value.
The guiding principles are simple: use the least intervention necessary, choose appropriate materials, and always prioritise the long-term preservation of the specimen. For collectors, developing these skills adds another dimension to the hobby—one that blends care, craftsmanship, and respect for the natural history each specimen represents.